
Buy a lead list. Load it into a tool. Start sending.
Then wonder why nobody replies.
The problem usually isn’t the copy. It isn’t the offer. It’s that the emails never arrived. They landed in spam — or worse, got silently filtered before the inbox ever saw them.
Cold email deliverability is infrastructure. And like any infrastructure, if you build it wrong at the start, everything built on top of it underperforms.
This guide covers everything you need to know before sending a single cold email — the technical setup, the paths available, the tools worth using, the warm-up process, and the best practices that separate teams generating replies from teams generating bounces.
Why Infrastructure Comes Before Everything Else
Here’s the sequence that plays out over and over:
- Define ICP
- Build lead list
- Write sequences
- Start sending
- Get poor results
- Blame the copy
Here’s the sequence that actually works:
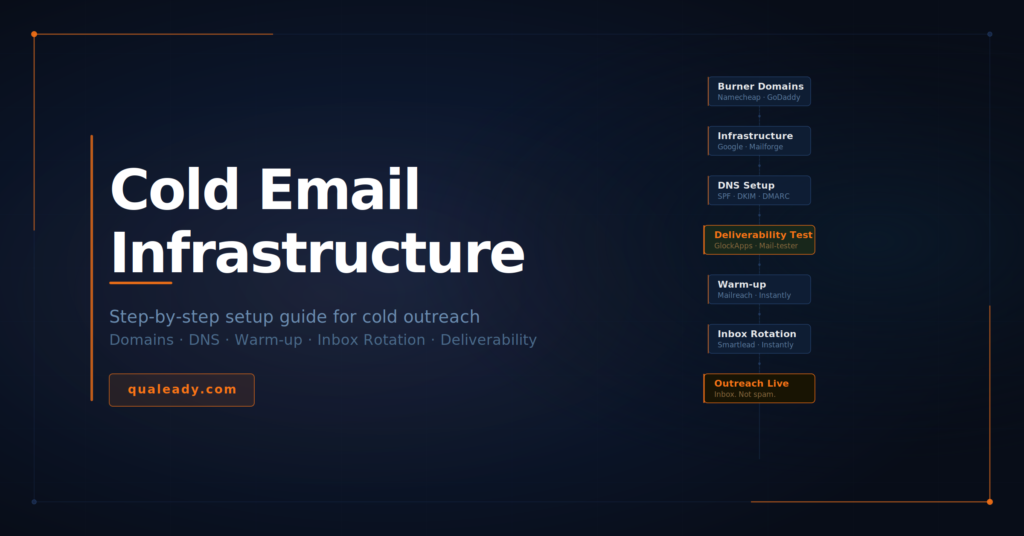
- Set up your sending infrastructure
- Test and verify deliverability
- Warm up properly
- Define ICP
- Build and verify your lead list
- Write sequences
- Start sending with a system that delivers
The difference is the foundation. Infrastructure first. Everything else is downstream of whether your emails actually land in the inbox.
Skipping steps one through three doesn’t save time. It wastes every hour spent on steps four through seven.
Step 1: Never Send From Your Primary Domain
This is the first rule. Non-negotiable.
Your primary domain — the one on your website, your company email, your brand — should never be used for cold outreach. Ever.
If it gets flagged, blacklisted, or damaged by a spam complaint, your entire business email operation goes down with it. Internal communications, client emails, sales follow-ups — all of it.
You need separate domains specifically for cold outreach. These are commonly called burner domains or sending domains.
How to choose burner domains
They should be close enough to your primary domain that recipients recognize who you are, but separate enough that damage is contained.
Good examples if your domain is qualeady.com:
- getqualeady.com
- tryqualeady.com
- qualeady.io
- meetqualeady.com
- qualeadyhq.com
Avoid anything that looks spammy or unrelated to your brand. The domain still needs to pass a basic trust check when someone looks it up.
Where to buy them
Namecheap is the go-to for most outreach setups — clean interface, competitive pricing, and easy DNS management. GoDaddy is a solid alternative if you’re already managing domains there.
Buy 2–3 domains minimum upfront. You’ll understand why once we get to inbox rotation.
Step 2: Choose Your Email Infrastructure Path
This is where the first real decision happens. Two main paths — and the right one depends on your team’s technical capacity and speed requirements.
Path A — Build it yourself on Google or Microsoft
You set up Google Workspace or Microsoft 365 accounts on your sending domains. Configure DNS records yourself. Manage mailboxes, sending limits, and warm-up manually or with a dedicated warm-up tool.
Pros:
- Full control over every setting
- Lower cost per mailbox at scale ($6–12/month on Google, similar on Microsoft)
- Google and Microsoft IPs carry strong baseline sender reputation
- Familiar interface — no learning curve
Cons:
- Requires manual DNS configuration
- Google has become increasingly aggressive about flagging cold outreach accounts
- Account suspensions happen — especially on Google — and recovery is slow
- You’re responsible for managing everything ongoing
This path works well if you have someone technical who can handle the setup and doesn’t mind the maintenance overhead.
Path B — Use a purpose-built cold email infrastructure tool
Tools built specifically for cold outreach handle domain provisioning, mailbox creation, DNS configuration, and sometimes warm-up — all under one roof.
Mailforge is worth knowing here. It provisions mailboxes at scale, handles the technical setup automatically, and integrates with major cold email sending platforms. If you want infrastructure ready in hours rather than days without touching DNS records manually, this is where to start.
Infraforge is a strong alternative in the same category — good for teams who want dedicated IP infrastructure rather than shared sending pools.
Pros:
- Setup in hours, not days
- DNS records handled automatically
- Built for deliverability from the ground up
- Easier to scale mailboxes quickly
- Some include built-in warm-up networks
Cons:
- Higher cost per mailbox than DIY ($15–25/month range)
- Less granular control over IP reputation
- Dependent on the provider’s infrastructure health
If there’s no dedicated technical resource on the team, Path B gets you sending faster and with fewer mistakes. If you have volume and technical capacity, Path A gives you more control and lower cost over time.
Many serious outreach operators run a hybrid — Google Workspace or Microsoft 365 for core sending accounts, infrastructure tools for additional scale.
Step 3: Configure Your DNS Records Properly
This is the technical foundation. Get this wrong and nothing else matters.
Three records must be configured on every sending domain before a single email goes out. There are no shortcuts here.
SPF — Sender Policy Framework:
SPF tells receiving mail servers which IP addresses are authorized to send email on behalf of your domain. It’s a DNS TXT record that lists your approved sending sources.
Without SPF, receiving servers have no way to verify your email is legitimate. Many route unauthenticated email to spam automatically.
A basic SPF record for Google Workspace: v=spf1 include:_spf.google.com ~all
The ~all at the end means soft fail — emails from unauthorized sources get marked as suspicious but not outright rejected. Some senders use -all for a hard fail, which is stricter. For cold outreach, ~all is the safer starting point.
Important: If you’re using multiple sending providers, all of them need to be included in a single SPF record. You’re limited to 10 DNS lookups per record — if you’re combining providers, plan this carefully.
DKIM — DomainKeys Identified Mail
DKIM adds a cryptographic signature to every email you send. The receiving server uses a public key published in your DNS to verify the signature matches. If it does, the email is confirmed as genuinely coming from your domain and untampered with in transit.
Without DKIM, your emails lack authentication. Gmail and Outlook treat unauthenticated email with significantly higher suspicion — and increasingly, so do their spam filters.
DKIM setup involves three steps
- Generate a key pair through your email provider
- Publish the public key as a DNS TXT record on your domain
- Your provider signs all outgoing emails with the private key automatically
Email providers walk you through this during setup. The critical step is verifying it’s actually working afterward — DNS misconfigurations are common and easy to miss.
DMARC — Domain-based Message Authentication Reporting and Conformance
DMARC builds on SPF and DKIM. It tells receiving servers what to do when an email fails authentication checks, and sends you reports so you can monitor your domain’s email health.
A basic starting DMARC record: v=DMARC1; p=none; rua=mailto:dmarc@yourdomain.com
p=none means monitor only. Failing emails still get delivered, but you receive aggregate reports on what’s happening. As your setup matures, you can move to p=quarantine (failing emails go to spam) or p=reject (failing emails are blocked entirely).
For cold outreach domains, start with p=none. It gives you visibility without accidentally blocking your own emails during the setup phase.
Custom Tracking Domain
If you’re tracking opens or clicks, set up a custom tracking domain — a subdomain that your tracking links redirect through. This prevents you from sharing tracking infrastructure with thousands of other senders, which is a real deliverability risk if that shared domain gets flagged.
Cold email tools typically support custom tracking domains in settings — configure this before your first campaign goes live.
Verify everything before moving on
After configuring SPF, DKIM, and DMARC, verify them before touching warm-up or outreach:
- MXToolbox — comprehensive DNS lookup and record verification
- Mail-tester.com — send a test email and get an instant deliverability score
- Google Postmaster Tools — monitor domain and IP reputation over time for Gmail sends
DNS changes can take up to 48 hours to propagate. Verify after that window, not immediately after saving the record.
Step 4: Test Your Deliverability With GlockApps
Before warming up and before sending real outreach, you need to know where your emails are actually landing.
GlockApps is the tool for this. It lets you send test emails to a set of seed inboxes across major providers — Gmail, Outlook, Yahoo, and others — and shows you exactly where each one landed: inbox, spam, or promotions tab.
You get a deliverability score and a breakdown by provider. This tells you immediately if something is wrong with your DNS configuration, your domain reputation, or your email content — before any real prospects see it.
How to use GlockApps in your setup
Run a GlockApps test at three points:
- After DNS configuration — confirm SPF, DKIM, and DMARC are set up correctly and your baseline deliverability is clean before warm-up begins.
- After warm-up — confirm your mailboxes have built enough reputation to land in the inbox consistently. Don’t start real outreach until you’re hitting inbox placement above 90% on the providers your prospects use.
- During active campaigns — run periodic tests every 2–3 weeks to catch any deliverability degradation before it compounds. A campaign that starts strong can drift into spam as complaint rates accumulate. GlockApps catches this early.
The test takes minutes to run and gives you data that would otherwise take weeks of real send volume to observe. Use it consistently — not just once at setup.
Step 5: Warm Up Your Mailboxes — Properly
This is where impatience does the most damage. And where deliverability problems almost always start.
A new email account has zero reputation. Internet service providers don’t know if it’s a legitimate sender or a spammer. Send 100 cold emails a day from a brand new mailbox and every major provider will flag it.
Warm-up is the process of gradually building sending reputation — starting with low volume, high-quality sending behavior and increasing over time until the mailbox is trusted.
How warm-up works
Warm-up tools work by connecting your mailboxes to a network of other real accounts. Those accounts send emails to each other, reply to them, mark them as important, and move them out of spam if they land there. This creates a sustained pattern of positive sending signals that builds domain and mailbox reputation over time.
The tools worth using:
- Mailreach — strong warm-up network, good deliverability monitoring built in, pairs well with any sending platform
- Lemwarm — Lemlist’s warm-up tool, solid for teams already in the Lemlist ecosystem
- Warmup Inbox — straightforward, reliable, good for teams running multiple mailboxes at scale
- Smartlead — built-in warm-up included with the sending platform, good if you want infrastructure and outreach in one place
- Instantly — same as Smartlead, warm-up is native to the platform
If you’re already planning to use Smartlead or Instantly as your sending platform, use their built-in warm-up. One less tool to manage.
The warm-up schedule
A responsible warm-up timeline looks like this:
Weeks 1–2: 5–10 emails per day per mailbox. Warm-up traffic only. No real outreach.
Weeks 3–4: 20–30 emails per day per mailbox. Still primarily warm-up traffic.
Weeks 5–6: 30–50 emails per day. Begin limited real outreach — 10–20 cold emails per mailbox per day maximum alongside continued warm-up.
Week 7 onwards: Gradually scale real outreach while keeping warm-up running in the background permanently.
The minimum before any real outreach: 4 weeks. Six weeks is better. Eight weeks is the right baseline for high-volume operations.
Keep warm-up running permanently — even when campaigns are active. It maintains reputation between send bursts and recovers reputation if a campaign generates complaints.
What kills reputation during warm-up
- Sending too much too fast
- High bounce rates from unverified lists
- Spam complaints
- Spam trigger words in subject lines or body copy
- Hitting spam traps — invalid or honeypot addresses that exist purely to catch bad senders
- Sending to unverified lists before checking them
This is where infrastructure and list quality connect directly. Bad lists generate bounces and complaints. Bounces and complaints damage your sending domain. A damaged sending domain means future emails — even to good contacts — stop reaching anyone.
Step 6: Inbox Rotation
One mailbox sending 100 emails a day is a red flag to every major provider.
Ten mailboxes each sending 10 emails a day looks like normal human behavior.
Inbox rotation is the practice of distributing outreach volume across multiple mailboxes and domains so no single account shows suspicious sending patterns. It’s not a trick — it’s how legitimate high-volume sending actually works.
How it works in practice
Cold email platforms like Smartlead, Instantly, and Lemlist support inbox rotation natively. You connect multiple sending accounts to a campaign and the platform automatically distributes sends across them — no manual management required.
A realistic setup for a team running serious outreach volume:
- 3 sending domains
- 3 mailboxes per domain
- 9 total mailboxes
- Each sending 20–30 emails per day
- Total daily volume: 180–270 emails
This volume is sustainable long-term without triggering provider flags. It also gives you redundancy — if one mailbox gets flagged or suspended, the others keep running.
Why multiple domains matter
If all your mailboxes sit on a single domain and that domain gets flagged, everything stops. Spreading across 3 domains means a problem with one domain doesn’t take down your entire outreach operation.
This is the practical reason to buy 2–3 burner domains upfront rather than one. The cost difference is minimal. The risk difference is significant.
Inbox rotation best practices
- Hard limit: never exceed 50 emails per day per mailbox for sustained outreach
- Keep at least 30–40% of daily sends as warm-up traffic alongside real outreach
- Stagger sending times across mailboxes — 9 mailboxes sending simultaneously at 9am looks like automation
- Use slightly different from-names and signatures across mailboxes
- Monitor each mailbox’s reply rate and bounce rate individually — one bad mailbox can signal problems before they spread
Step 7: Technical Sending Settings That Matter
A few settings inside your cold email platform that directly affect deliverability and don’t get enough attention.
Daily sending limits: Set hard limits per mailbox. 30–50 emails for established accounts. 10–20 for accounts still within the first 8 weeks of operation.
Sending intervals: Never send back to back instantly. Set a randomized delay of 3–8 minutes between sends. Automated sending at machine speed is a known spam signal — randomized intervals mimic human behavior.
Plain text vs HTML: Heavy HTML emails with images, multiple links, and rich formatting look like marketing emails. Cold outreach performs better — on deliverability and reply rates — when it looks like a message from a real person. Plain text or near-plain text is almost always the right call.
Open tracking: Consider disabling it entirely. Open tracking pixels are a known spam signal that some providers use in their filtering logic. If you must track opens, at minimum use a custom tracking domain. Click tracking is more defensible but still warrants caution — every link is a potential deliverability risk.
Unsubscribe mechanism: Include one. Not just for legal compliance (CAN-SPAM, GDPR, CASL) — but because it gives recipients an alternative to marking you as spam. An unsubscribe click is infinitely better for your domain reputation than a spam complaint.
Sending windows: Send during business hours in the prospect’s time zone. Emails arriving at 3am look automated. Emails arriving at 9am or 2pm look like a person sent them.
The Full Infrastructure Stack: What It Looks Like
To make this concrete — here’s what a properly built cold outreach operation looks like for a B2B team running serious volume:
| Component | What | Detail |
|---|---|---|
| Domains | 3 burner domains | Namecheap or GoDaddy |
| Mailboxes | 9 total (3 per domain) | Google Workspace or Mailforge |
| DNS | SPF + DKIM + DMARC | Verified on all 3 domains |
| Deliverability testing | GlockApps | Pre-warmup, post-warmup, ongoing |
| Warm-up | 6 weeks minimum | Mailreach, Smartlead, or Instantly |
| Sending platform | Inbox rotation native | Smartlead or Instantly |
| Daily volume | 180–270 total sends | 20–30 per mailbox across 9 accounts |
| Tracking | Custom tracking domain | Open tracking off or minimal |
This setup is stable, scalable, and protects sending reputation long-term. It also gives you enough redundancy that a single mailbox or domain issue doesn’t derail your entire outreach operation.
Path Comparison: DIY vs Infrastructure Tools
| DIY Google / Microsoft | Infrastructure Tool | |
|---|---|---|
| Setup time | 3–5 days | Same day to 24 hours |
| Technical skill needed | Medium | Low |
| Cost per mailbox | $6–12/month | $15–25/month |
| Control | High | Medium |
| Suspension risk | Higher (Google especially) | Lower |
| Warm-up included | No — needs separate tool | Sometimes yes |
| Best for | Technical teams, high volume | Teams without a technical resource |
Tools Referenced in This Guide
For easy reference — every tool mentioned in this guide, plus list verification tools covered in depth in our list hygiene article:
| Tool | Category |
|---|---|
| Namecheap | Domain registration |
| GoDaddy | Domain registration |
| Google Workspace | Mailbox infrastructure |
| Microsoft 365 | Mailbox infrastructure |
| Mailforge | Cold email infrastructure |
| Infraforge | Cold email infrastructure |
| MXToolbox | DNS verification |
| Mail-tester.com | Deliverability score |
| Google Postmaster Tools | Domain reputation monitor |
| GlockApps | Inbox placement testing |
| Mailreach | Email warm-up |
| Lemwarm | Email warm-up |
| Warmup Inbox | Email warm-up |
| Smartlead | Sending platform + warm-up |
| Instantly | Sending platform + warm-up |
| Lemlist | Sending platform |
| ZeroBounce | List verification |
| NeverBounce | List verification |
| Millionverifier | List verification |
The Bottom Line
Cold email works when the infrastructure is solid.
The reason this work gets skipped is because it’s unsexy. The pull is always toward outreach. But every hour spent on proper setup is recovered tenfold in emails that actually arrive, get read, and generate replies.
The sequence is fixed: infrastructure first, deliverability testing second, warm-up third, outreach fourth.
Skip any of those steps, and the rest is largely wasted effort — regardless of how strong the list is or how sharp the copy is.
Get the foundation right. Everything else becomes easier from there.
At Qualeady, we build the full outreach infrastructure for B2B teams — domain setup, DNS configuration, GlockApps testing, warm-up, inbox rotation, and list hygiene — before any campaign goes live. If you want the system built properly without doing it yourself, get in touch.